Create webinar tags to label webinars, carry over into Integrations and overall use as search filters to easily find relevant sessions.
Note: This feature is exclusive to ourEnterprise and Events Packageplan holders.
You can now add webinar tags to your events.This allows you to label webinars so when integrating into Salesforce, Marketo, etc., the tags will carry over to your system of record.Webinar tags can also be used as search filters for webinars on your channel, making it easier for attendees to find relevant sessions for their needs.
Learn how to add webinar tags to your event below:
How to Create Webinar Tags
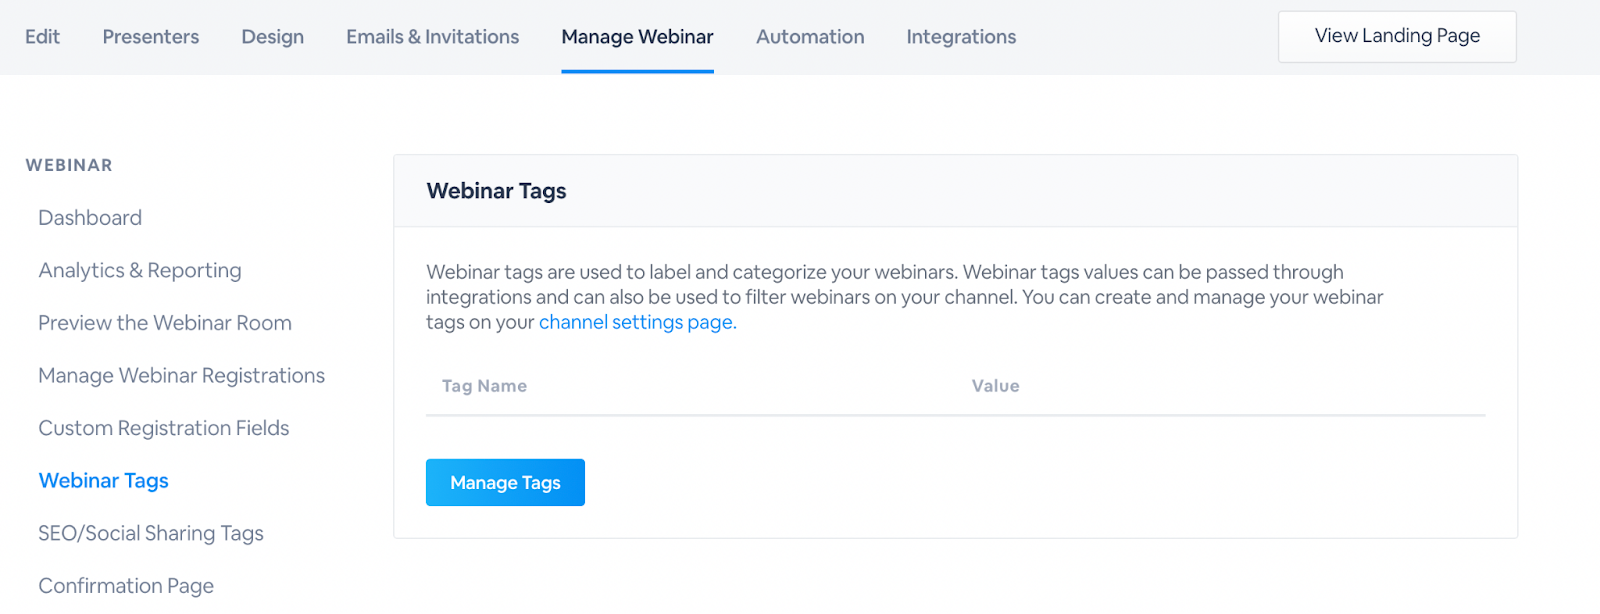
1.On your Channel, go to theSettingspage.
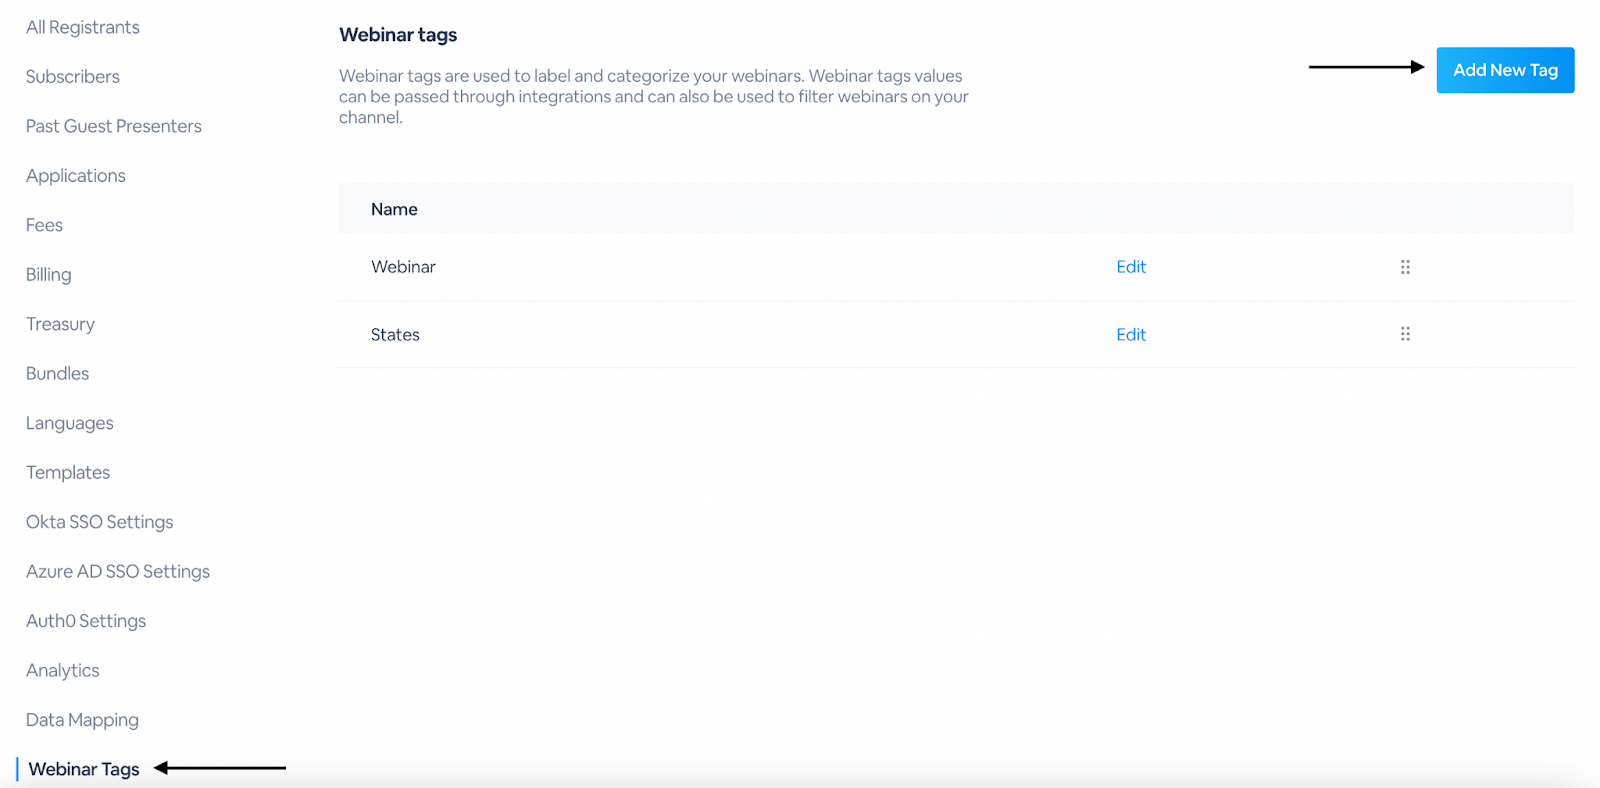
2.On the left-hand side of the page, scroll down and select theWebinar Tagstab.
3.ClickAdd New Tag
4.Enter theTag Namein the space provided.This will be used for searching and data mapping purposes.
5.Select your preferredResponse Type(Text Field, Text Area Field or Dropdown)
6.Enter in theDefault Value.
7.Check theUse this tag as a filter on channel pageif you would like to use as a filter.
8.ClickSaveto complete
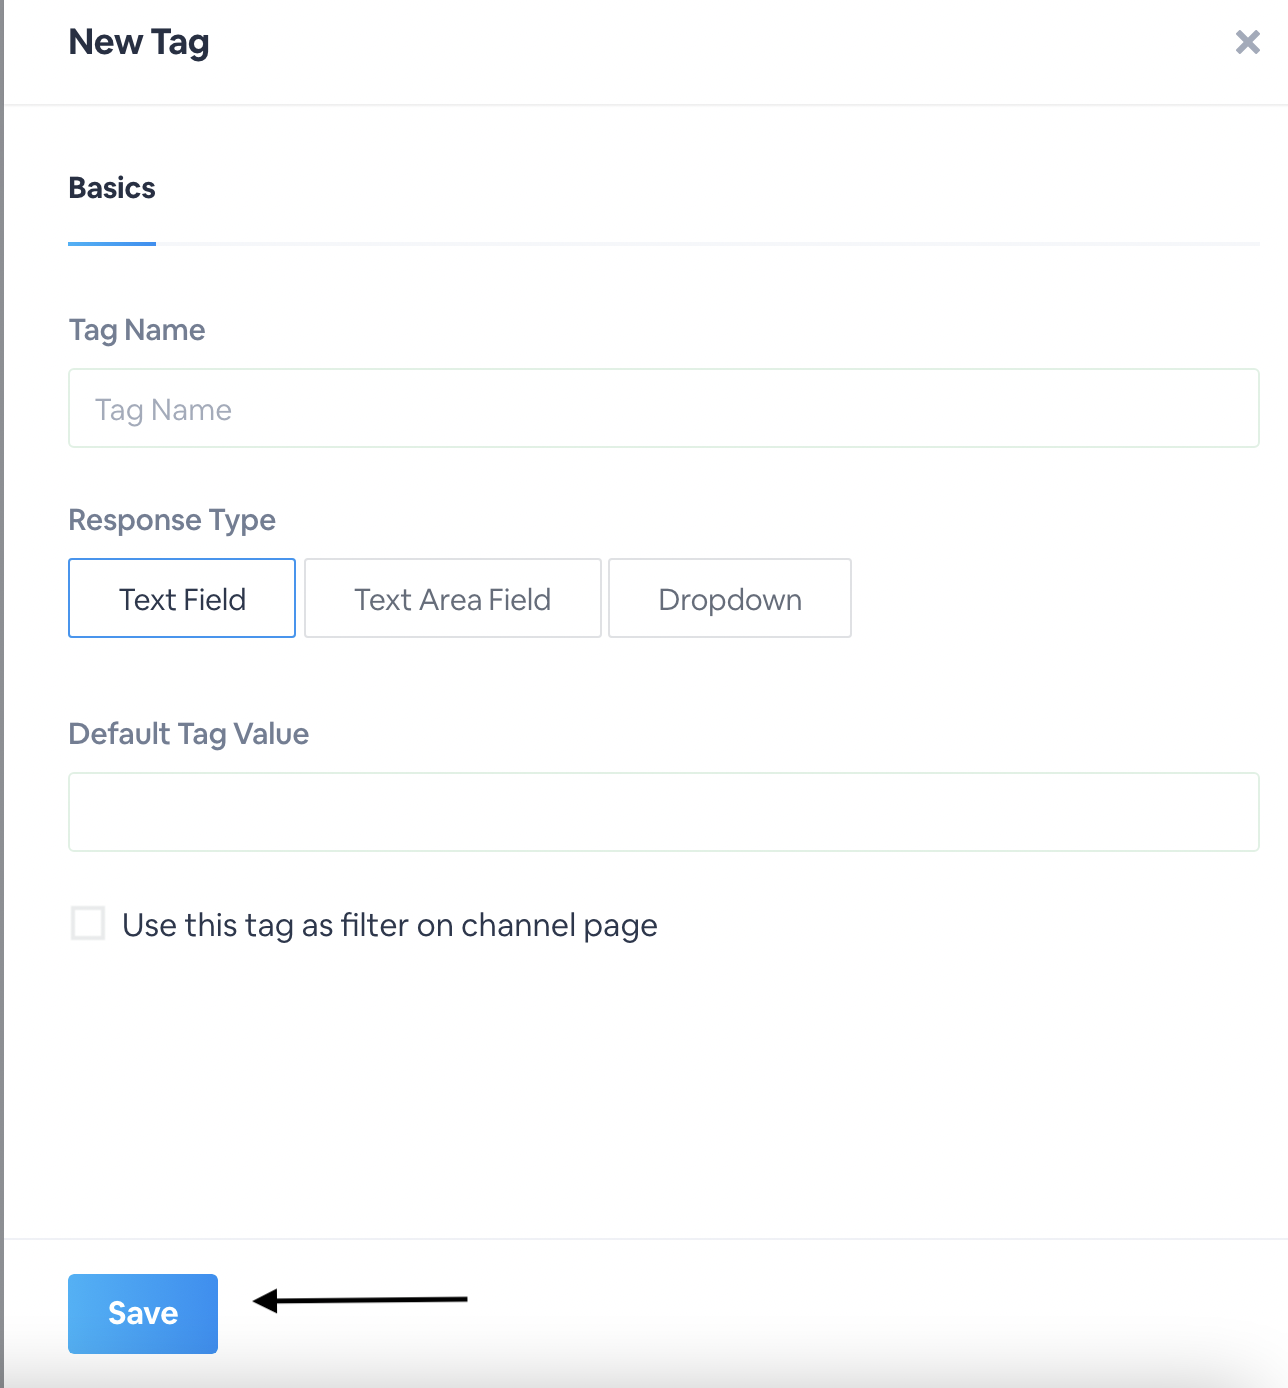
Note: For Default Value, if nothing is entered, then this will display as Default Value.
Webinar Tags serve two purposes, you can use them as search filters for your events on your channels or you can use them similarly to Custom Registration Fields for your integrations (learn more about Custom Registration Fieldshere).
How to Use Webinar Tags as Search Filters for your Channel
- Create a Webinar Tag following the steps above.
- Next, create a new webinar (learn morehere).Scroll to the bottom, and select which Webinar Tag you would like associated with your event.ClickCreate Webinarwhen finished.
- You will be prompted to select a Landing Page template, and then be taken to theManage Webinardashboard of your event.From there, navigate to your Channel's Main Page.
- In the right-hand corner, you will see a new text box or drop-down menu where your Webinar Tag is located.From there, you can select as many Webinar Tags you would like associated with your event and it will filter accordingly.
Watch the video below to see this in action.In this example, the Webinar Tag's name is States, the Response Type is a drop-down menu, the Response Options are New York, Chicago and California, and the Tag Prompt Name is Location:
Additionally, you can search your events by Webinar Tags on your homepage.Enter in the Webinar Tag in theSearchbar and it will pull up any event associated with that webinar tag.
How to use Webinar Tags as Custom Data Points for Integrations
When someone registers for your event, the webinar tag be included as a data point in their registration profile.Thus the webinar tag — and its associated data — will automatically flow to any tool with which you have an active integration with BigMarker.
For instance, say that you create a Webinar Tag named Custom Tag 1 and you have an active integration with HubSpot.The data you collect via that webinar tag will be stored in HubSpot under Custom Tag 1.
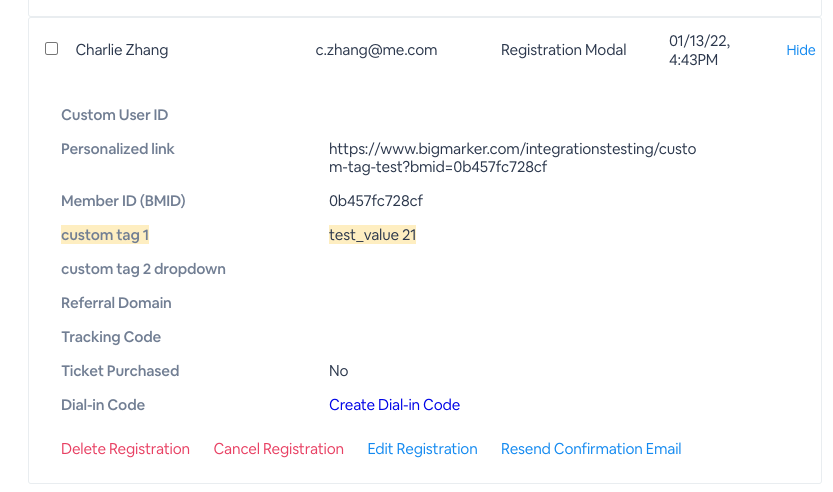
Note:You can confirm that your webinar tags are active — and collecting the right information — by checking an individual registrant's profile.To do this, go theManage Webinar Registrationstab of your webinar, select an individual registrant's profile in the list provided, then find your webinar tag and the registrant's response to that prompt (as highlighted below).ClickingEdit Registrationin this section will not show the registrant's webinar tag information.
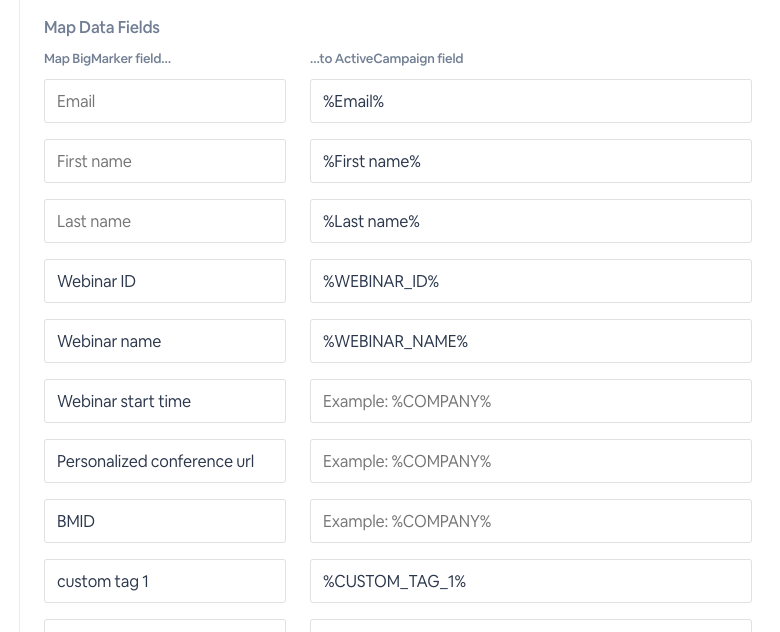
Using an ActiveCampaign integration, below is what the Webinar Tags will look like from an integration point of view:
Note:Webinar tags and their associated values will NOT be seen by users when registering for an event