Connect BigMarker with your active Salesforce campaigns to have webinar data sent directly to Salesforce and your campaign members data sent to your BigMarker webinars
New as of 10/01/2023:As of October 2023, upon authenticating your Salesforce integration for the first time, a "Connected App" will be created in your Salesforce environment:
BigMarkerwill be listed underConnected Apps→Connected Apps OAuth Usage
After selectingInstall, you will be able to adjust its authorization settings, updating or extending the refresh token expiration.Please seethis articlefor more details.

When you connect BigMarker with Salesforce, your BigMarker webinar registrations and data are sent directly to your active Salesforce campaigns.And it's a two-way street: you can also add your Salesforce campaign members as invitees and registrants to your BigMarker webinar. The best part?You can complete the integration in minutes.Learn more about how to
How to Integrate SalesForce with BigMarker
Note: You can authenticate and set up your SalesForce account on your Channel's Settings.This will carry your SalesForce authentication across all your webinars and series.Follow steps 1-3 to set up SalesForce integration.
This will authenticateonly the Production Environment.If you are looking to connect to the Sandbox Environment, you will need to do that on the webinar or series Integration section (Step 2).

1.When you create a webinar on BigMarker, navigate to your webinar dashboard and select theIntegrationstab.Find theSalesforceintegration.


2.ClickConnect to Salesforce Production Environmentto sync your Salesforce account with BigMarker.
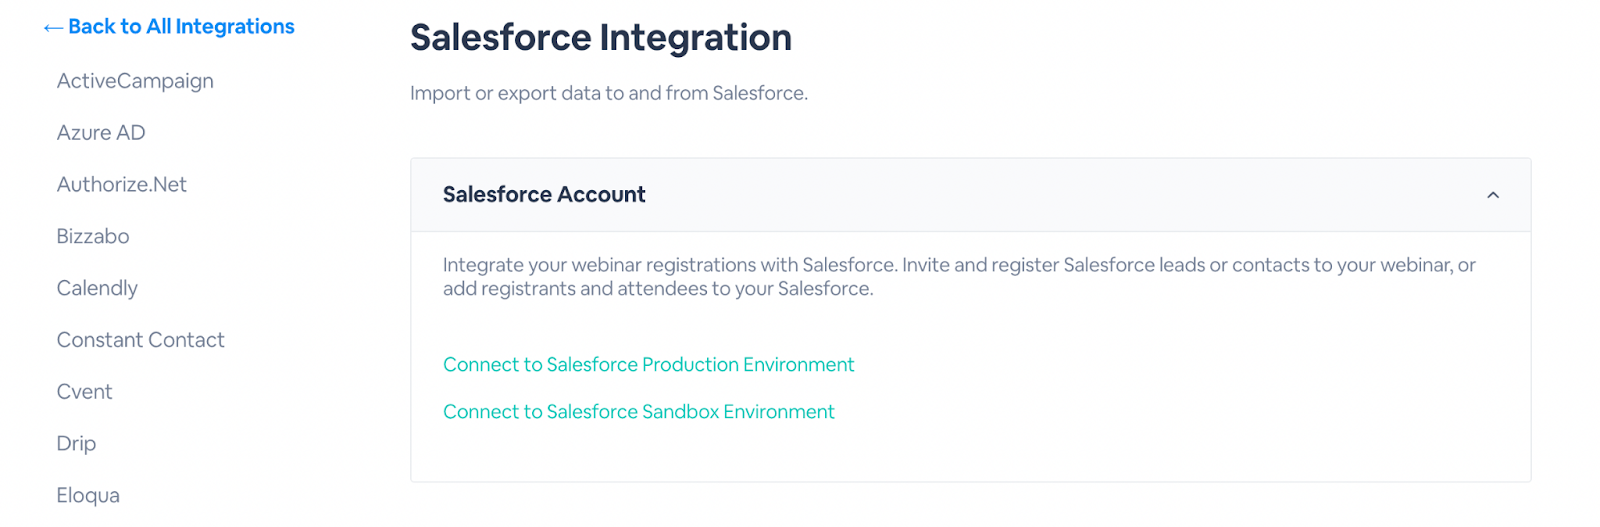
If you'd like test your Salesforce integration without harming the official data in your Salesforce account, selectConnect to Salesforce Sandbox Environment.This allows you to set up your integration, practice mapping data, etc.with no impact on your existing Salesforce records.
3.Log into your Salesforce account.
4.Import Invitations Settings:First, you'll upload the contacts from your Salesforce campaigns into invitation lists on BigMarker.
Once your Salesforce account is synced with BigMarker, your active Salesforce campaigns will automatically populate into the dropdown menu below "Salesforce Campaigns for Invitations." Select the list you would like to upload to BigMarker.Under Contact List Name for Import, give this contact list a name to be stored on BigMarker (e.g., "Salesforce Contacts").

5.Import Registrants Settings: Next, you can import contacts from active Salesforce campaigns to your webinar's registrant list.This automatically registers all of the contacts on that list for your webinar.
In the dropdown below, select your desired campaign.If you check the subsequent check boxes, any additional leads and contacts to that Salesforce campaign will automatically added as registrants to the associated BigMarker webinar as well (see following page).

Note:Step 6 is optional when setting up your Salesforce Integration.
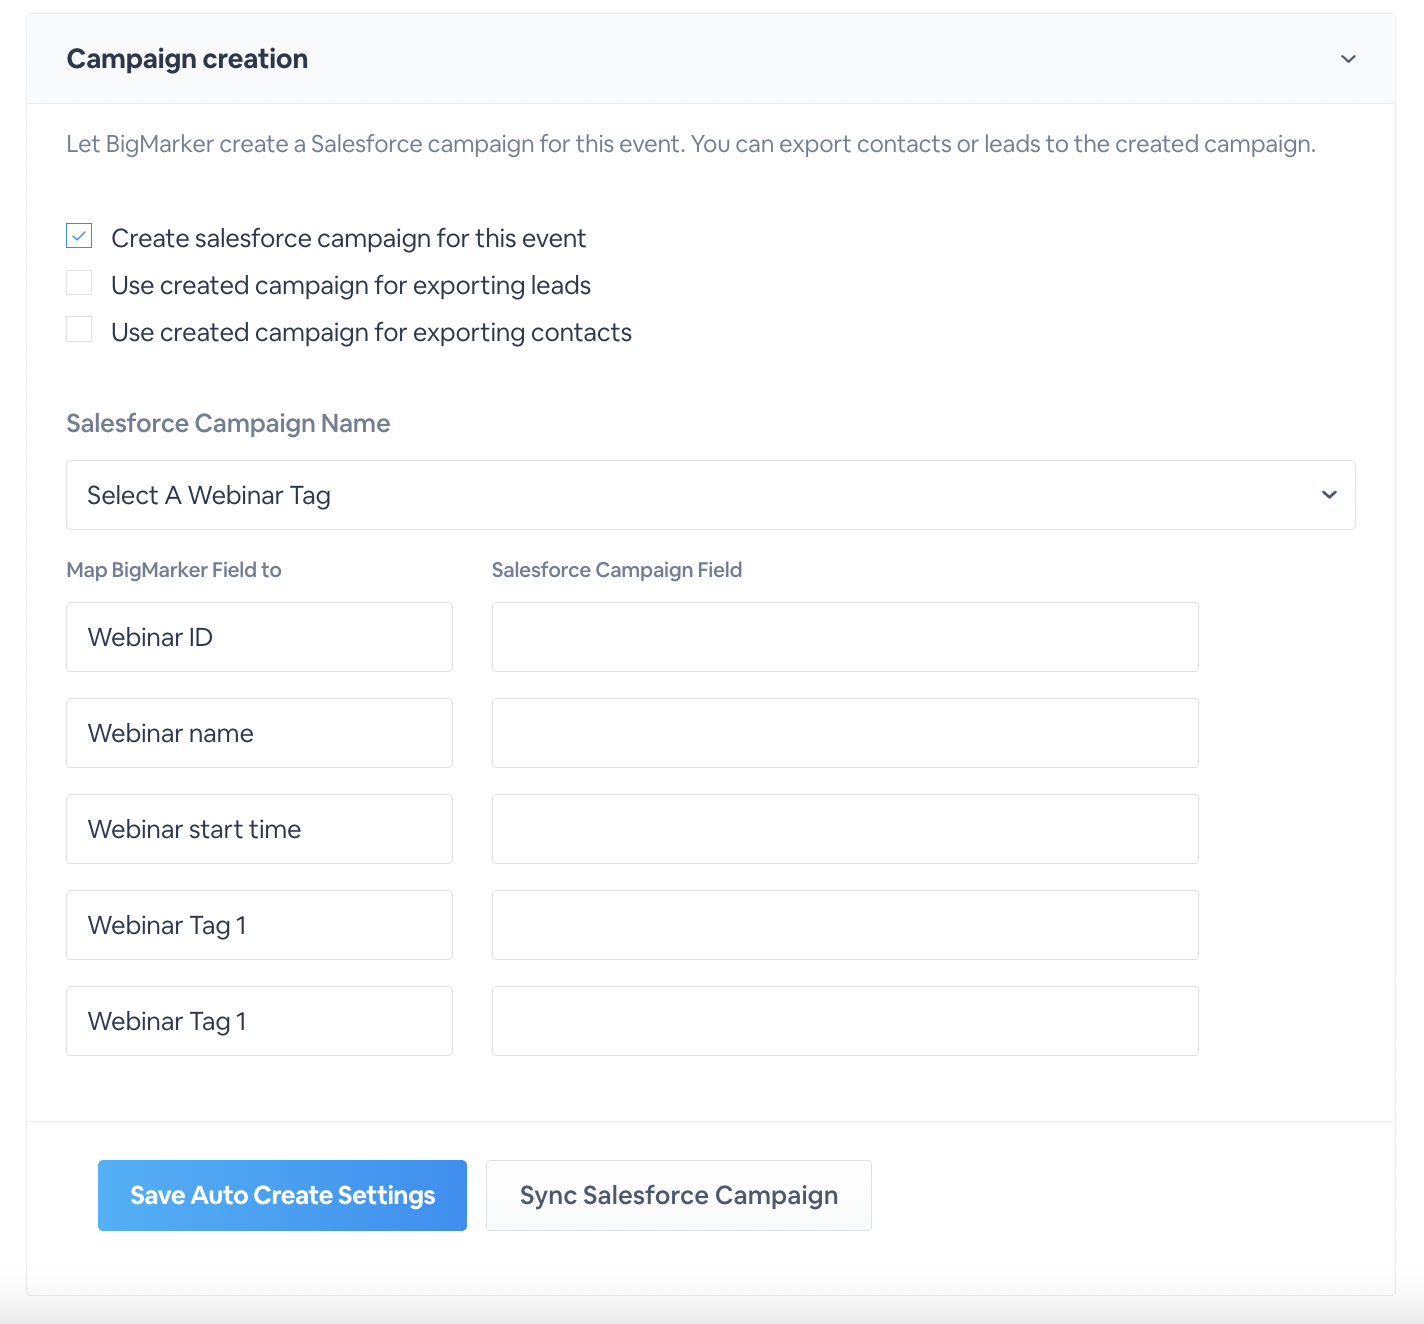
6.Create a Salesforce Campaign: Create a campaign of your Salesforce Events, either for your exported contacts or leads.This automatically creates your campaigns for you after setting up, reducing the time needed to manually create them.To do this,you will need to have webinar tags created and associated with the webinar.
Check offCreate salesforce campaign for this eventto turn this setting on.From there, select to create a campaign forexporting leads, exporting contacts or both.Then, use the dropdown menu to associate the webinar'swebinar tagfrom the Salesforce Campaign Name dropdown menu, andmap your Salesforce Campaign Fields to the equivalent BigMarker field.Once finished, clickSave AutoCreate Settingsto save the mapped fields, andSync Salesforce Campaignto create your campaign in Salesforce.
7.Export Lead Settings:Under Export Lead Settings, choose the Salesforce campaign that will receive attendee and registrant data from BigMarker (i.e., "Event Contacts and Attendees.).
Under Map Data Fields, you'll choose how specific data fields in your BigMarker webinar are saved in your Salesforce account.For example, if all of your webinars are listed under "Event Name" on Salesforce, you would type "Event Name" in the Salesforce Campaign Member Field to the right of "Webinar Name." Complete this process for Webinar ID, Webinar start time, conference url and BMID, then click Save Export Settings to complete the integration.

8.Export Contact Settings:Next, map data fields in BigMarker to their respective contact fields in Salesforce.For instance, the titles of webinars are stored as "webinar name" on BigMarker.If you are storing them as "webinar title" on Salesforce, enter "webinar_title" in the corresponding text entry.Repeat for the rest of the fields, then click save to complete.

9.Campaign Member Settings:Finish by mapping data fields in BigMarker to their campaign member fields in Salesforce.It is important to note that before mapping data fields from BigMarker to their campaign member fields, they MUST be mapped to either a contact or lead within Bigmarker first.
New as of 01/11/2023:Now, choose to set how long attendees must attend the live webinar or watch the on-demand recording for the data to be exported to your campaign.For example, an attendee must attend 50% of the webinar in order for their data to export.
For instance, the titles of webinars are stored as "webinar name" on BigMarker.If you are storing them as "webinar title" on Salesforce, enter "webinar_title" in the corresponding text entry.Repeat for the rest of the fields, then click save to complete.

Note: For On-Demand Webinars, you must map theWatched Recording Fields.

10.Export Attendee Data Stream via Salesforce Custom Object Setting:Keep track of your attendance within live events through exporting live attendee data to SalesForce in 5 minute intervals.After your event starts, utilizing the API name entered below, a record of every attendee within the webinar room will be created.With the consistent export of data, tracking attendance in your events is easier than ever before.
ClickEnable Attendee Data Stream Exportand enter in theAPI name of the Salesforce Custom Objectyou would like to use for this export.Below, you can map any data fields needed and then click save to start the export.
